 Pie Crust") If you think a lattice crust is beyond your culinary skill, I have some terrific news for you. This woven design — which always looks terribly chic on a fruit pie — is a cinch to achieve! As proof, check out my step-by-step tutorial:
If you think a lattice crust is beyond your culinary skill, I have some terrific news for you. This woven design — which always looks terribly chic on a fruit pie — is a cinch to achieve! As proof, check out my step-by-step tutorial:
") To start, place some homemade pastry dough (I use Pâte Brisée Sucrée, recipe here) on a lightly-floured work surface…
To start, place some homemade pastry dough (I use Pâte Brisée Sucrée, recipe here) on a lightly-floured work surface…
 And roll it into a 12-inch-diameter circle. A French rolling pin is your friend here.
 Then grab a sharp knife or a pastry-cutting gadget…
 And slice the dough into 3/4-inch-wide strips. You’ll end up with more strips than you’ll need, but that’s okay. As you’ll soon discover, I have a neat trick for leftover dough.
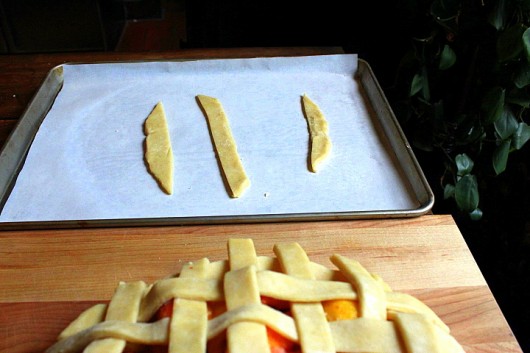
 Transfer the strips to a parchment-lined baking sheet, and pop them in the fridge. Chill for 10 minutes or so, just to firm up the butter in the dough.
Are you still with me? I only ask because you’ve been awfully quiet.
Perhaps you’re the strong, silent type.
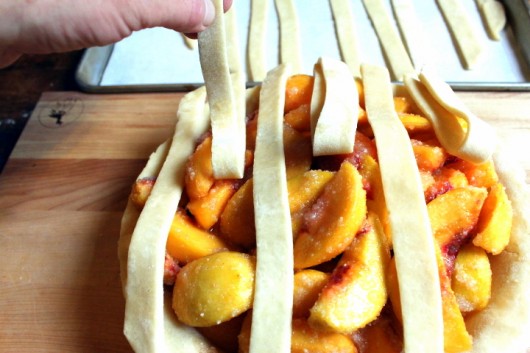
 Lay 6 ribbons of dough vertically across the filling. Use long-ish strips at the center, and shorter strips at the sides.
 Working from left-to-right, fold back every second strip at the center. In other words, fold back the 2nd, 4th, and 6th strips.
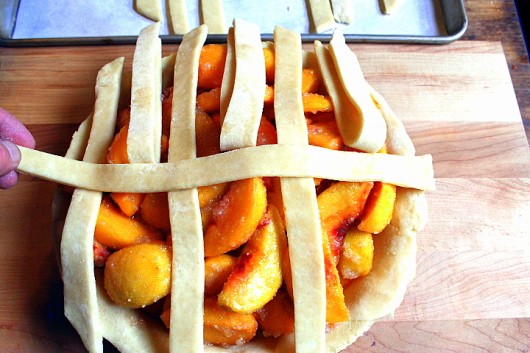 Then grab another long ribbon, and lay it horizontally across the center.
 Unfold the vertical ribbons, so they lay on top of the new, horizontal strip.
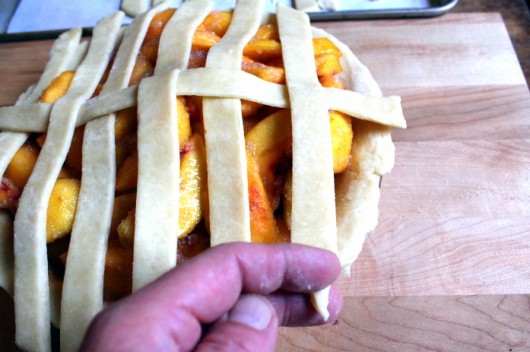
 Now fold back the 1st, 3rd, and 5th vertical strips…
 And lay down another horizontal strip. Unfold the vertical strips.
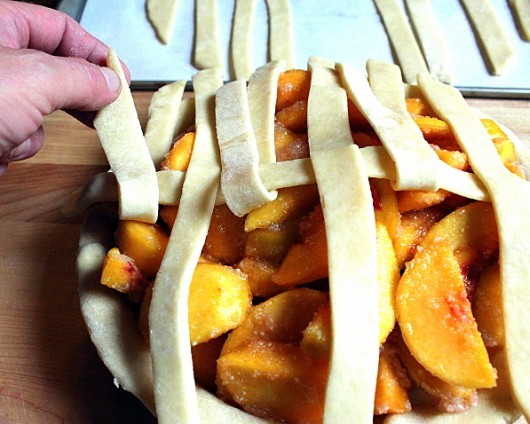
 Then fold back the 2nd, 4th, and 6th strips of dough…
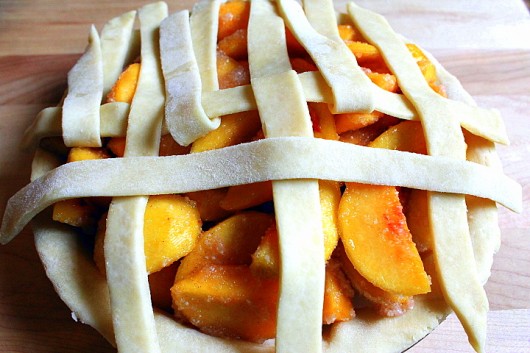
 And unfold, to complete one half of the pie.
Then flip the pie around, and weave the other side.
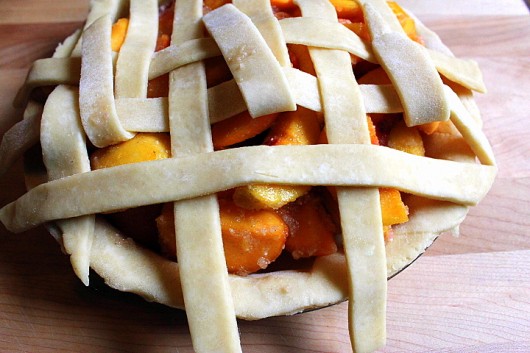
 Your finished pie will look something like this. It will look even better if you’re not taking pictures of the whole procedure.
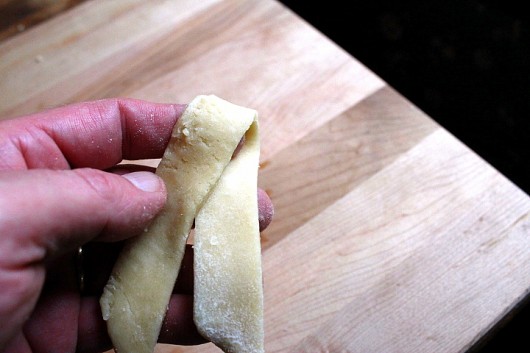
 Oh. You’ll probably have some dough left over. Wanna use these pieces in some imaginative way?
 Eat ’em.
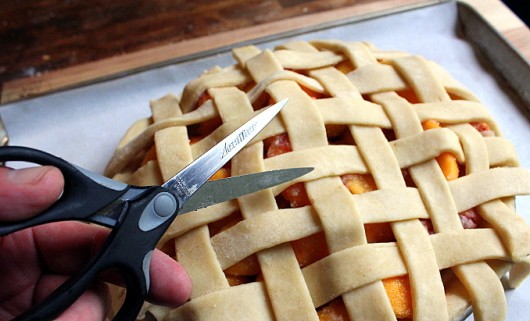 Now grab scissors or a sharp knife…
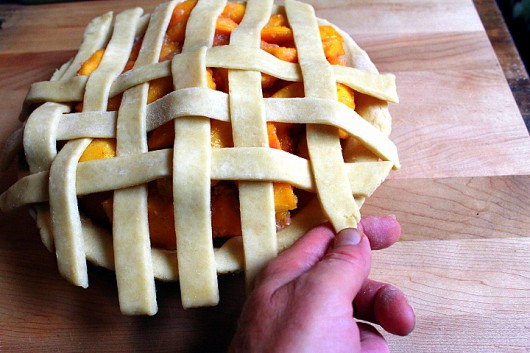
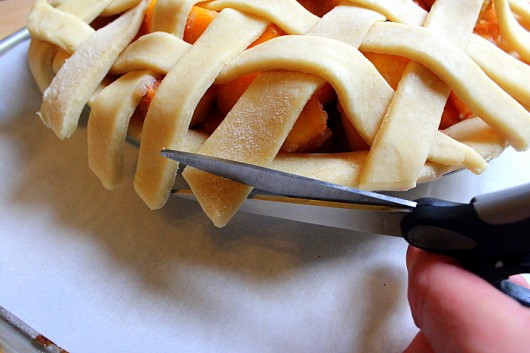 And cut off the bits of lattice that hang over the side of the pie.
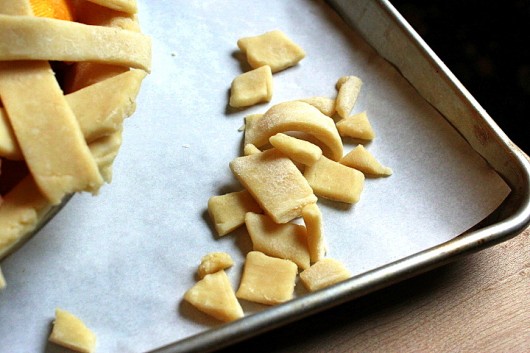 Eat the clippings.
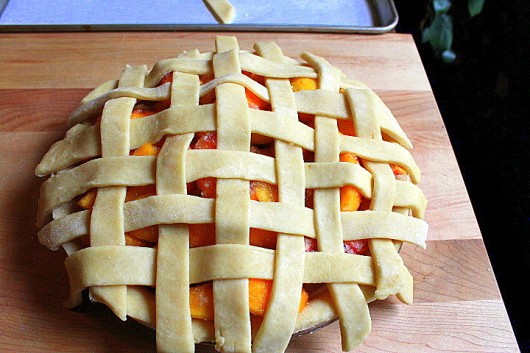
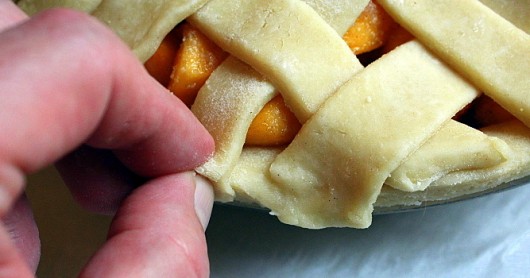 Pinch together the lattice ends and the bottom crust.
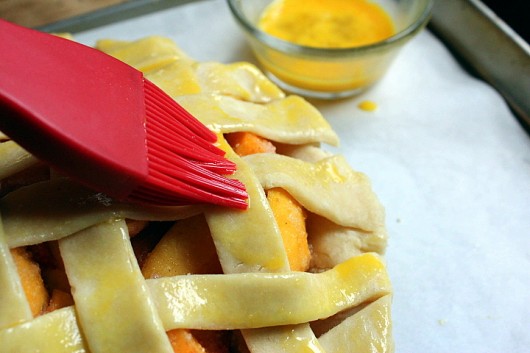 Then, for a beautifully-bronzed crust, brush the lattice with beaten egg…
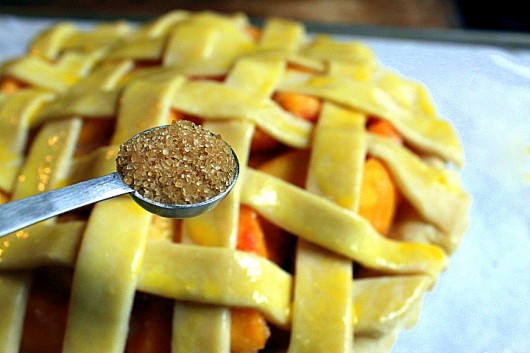 And for sparkle and crunch, finish with a sprinkling of Demerara sugar. Or, just use regular granulated sugar.
One final tip. To insure your wondrous weave holds its shape, chill the pie for at least 10 minutes before baking.
 Was this tutorial helpful to you in some teeny-tiny way? Perhaps you can let me know by leaving a comment.
Love ‘ya!
Enjoy this post? Sign up for Kevin’s email updates.
More fun:
Bean Dip with Fresh Rosemary and Sage
Garlicky Zucchini Pizza
Fabulous (and gluten-free!) Almond Butter Cookies

lora kling says
Easy peasy!
Kevin Lee Jacobs says
Hi lora kling – Yes. And fun to do!
Joyce Bradley says
I so enjoy your beautiful pictorial instructions…..even if I never make it! This does look a lot easier than I’d thought!!! Your great Kevin!!
Lisa says
Chilling first, great idea! Thanks for the tip.
Durf says
I’ve made them quite a few times. But why does it always look easier when you and Martha show how?
Kim says
Just made your fabulous Tomato Basil Pie. Can’t wait to shop for peaches to make this pie and your crust recipe. Have loved every recipe I have tried. When is the cookbook coming?
Christine Ferrigno says
I agree with Lisa!
Brenda Johnson says
Having seen this pie in person- I can attest to what a true beauty it is!!!! Blue ribbon beautiful!!!! These step by step instructions make it so easy to understand- anyone can do it!!! Thanks Kevin!!!
Elizabeth says
Always wondered about how to do that!
Donna Wolff says
Made it look easy! Beautiful photos.
Diane Kratz says
I will do this with my next blueberry pie. Never thought to chill it- thanks for the oh so sharp instructions. Especially loved your tips for the leftover dough scraps! Priceless!
Tina H says
Thank you! You make it seem easy! If you have left over pie dough, make Rolly Pollies!
CarolAnn says
Nicely done. Why would you eat the raw dough though? Sprinkle with cinnamon sugar and bake. They’re like little tea cookies. Very delicious.
Janet. Wright says
Always try to do this, but never got it right. Will surely try this the next time I make a pie. Thanks.
Beverly, zone 6, eastern PA1 says
Lovely set of photos. So valuable for visual learners.
I do a braided or lattice crust the same way except instead of slicing with a pizza cutter, I use a wiggly edged, wood-handled pastry wheel. Each slice then appears to be the dough version of a seamstress’s “rick rack”. It’s kind of like this implement:
https://www.etsy.com/listing/240871212/french-pastry-crust-cutter-pie-crimper?ga_order=most_relevant&ga_search_type=vintage&ga_view_type=gallery&ga_search_query=pastry%20wheel&ref=sr_gallery_23
Glad to see another use for Demerara sugar, too. You are keeping us on our toes in the kitchen!
Pam Hanson says
Look out red haven peaches, your destiny has been decided!! Thanks Kevin, you are always an inspiration
Giuditta says
I never knew to chill the pie before baking. Always learning from you!
Theresa Ryan says
Okay, Kevin! Confess! How do you stay so slim after eating pie crust clippings, and the finished yummies?!
Louise says
Love it. I have made all sorts of pies for years. But have you successfully made a gluten free pie crust? I’ve tried a few. Awful.
Any ideas?
Sue says
Splendid! Peach Pie is my favorite- my mom would freeze one in the summer for my mid-October birthday. Nothing like lattice crust to dress up a pie! Thanks K!
dawn says
Thanks for the tutorial. Will have to try soon!
Susan says
You really make it look easy Kevin. Thanks.
Susan Villiere says
You have made it easy…I shall copy your technique from now on,
Julie says
As an old Home Ec teacher, I give you an A–both in the end product and in your teaching technique. Looks so hard, but is really easy once it’s laid out and you can visualize weaving.
Pat says
Simple as pie! Thanks so much.
miki says
Excellent tutorial! Now I will have to try it! Thank you!
Kevin Lee Jacobs says
Hi Julie – I first read that grade as an A-minus. Then I realized the minus symbol was a long dash. Phew!
MEGAN BLACK says
Thanks! I have been making pies for 60 years and now will attempt a lattice top. I just picked my peaches yesterday so I am READY!
Carolyn says
Love this idea!
Paul McGarity says
You make it look easy. I will have to try it.
Pam says
Like the tip about putting it in the fridge for 10 min. before baking. Didn’t know that!! Thanks! And I am going to make your tomato pie. I am patiently waiting for the 2 large tomatoes to ripen perfectly! Can’t wait! Thanks, Kevin! Have a great week!
Lainey says
A man after my heart – the only other person I *know* who eats raw pie dough!
Joan says
Thank you Kevin. I have made lattice tops before but I did it the hard way working from one side to another, such a pain. Your way of working from the center out is soooooo much easier and the lattice strips won’t tear in the weaving. This is the way I am going to make lattice top pies from now on. Thank you so much.
Alyce says
Clear instructions and good tips. Thanks.
Scraps: brush some melted butter on scraps, sprinkle on Parmesan cheese and bake for cheesy tidbits.
Susan McRae says
Thanks for the tutorial. Have always wanted to do a lattice crust.
Christine says
Kevin you are a RIOT…I love reading your blog…I love your recipes…I love your garden…are you married? Oh wait…I am…scratch that…so I’m going to make your peach pie and I know I’m going to love it.
Janice says
I always sprinkle cinnamon sugar on my dough scraps ( brush with milk first) and bake. Delish!
Cerise Terry says
So glad I came across your sight, It has been entertaining and helpful. You are so gracious and fun, Cerise
Kerry Lacey says
Hi Kevin! First time I’ve ever commented on any post, ever. I so enjoy your humor and the lattice topped peach pie is perfect timing! Peaches just wonderful in Michigan now. Just running out to get some fresh peaches to make a pie! Can’t forget the vanilla ice cream. Oooooo.. do you have a good recipe for the real I AM vanilla ice cream?
Kerry Lacey says
Tina: What’s a rolly polly???? left over crust brings back HAPPY childhood memories of a yummy little rolled treat made from left over dough at my grandfathers farm. Intrigued!
Dola says
Great tutorial on the lattice work! So simple so why didn’t I think of that? Thanks a bunch.
Miller says
Maybe I missed it, but do you have a “Print” button for this lattice pie crust method? Thanks for you great emails!
charlotte zeuner says
Love love your site!!!! Most of your the recipes are just wonderful. Have always made tomato pie with piecrust but with temps soaring above 90s todaytried it with bisq. simpily wonderful and didn’t even break a sweat. Thanks so much. Getting ready to start indoor shelfs want to use it for herbs too.Kevin wish we lived close sure we would have great fun!! Keep up the great info on your site. Our peaches are wonderful this season along with our corn. Will be making peach pie later in the week and hope it cools down would love to make some clam/corn chowder. Thanks again charlotte from south jersey
Maureen says
great photos! It has been a long time since I did a pie with lattice-I like keeping it simple.
Pat says
The pictures were very helpful, but I didn’t see the filling recipe.
Katey says
LOL! i needed this tutorial a week ago when i made your rhubarb pie recipe. and yes, i somehow got blessed with fresh rhubarb in August in the same zone as you!
Jessica says
Yes, that’s exactly how my grandmother taught me.
J says
I was so entertained by the suspense created to Finally know what do to with the scraps. and then the solution………again, priceless reading
Thank you for every th ing Kevin, hope all is well
Maraya says
WARNING!! The FDA has issued a warning not to eat raw dough of any kind because there has been a spate of illness from E. coli in flour. See http://www.fda.gov/ForConsumers/ConsumerUpdates/ucm508450.htm
Sorry to be a spoil sport. The recipe is a keeper, and I can’t wait to try it with our wonderful Colorado peaches!
John says
That is exactly what I do, Kevin….except I don’t eat the clippings. I cook them up separately, and then eat them LOL
Linda says
Kevin, brush the scraps with milk or leftover eggwash. Sprinkle with a mixture of cinnamon and sugar and bake for 15 min or so. My kids used to love this when they were little.
JB says
Great and simple idea to chill the strips before assembling. Love your site and videos! Happy New Year