Last updated on November 23rd, 2014
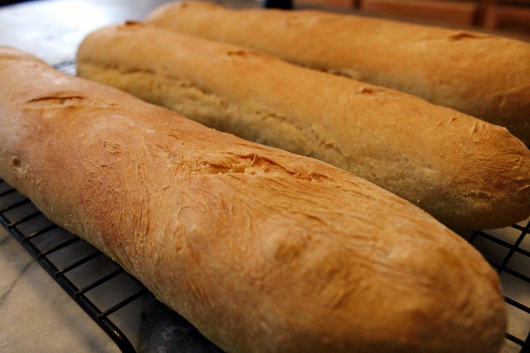 WHAT’S A BAGUETTE? It’s a rope-like loaf with a deep, yeasty aroma, a chewy interior, and a crust that goes Snap! Crackle! Pop! when you bite into it. My easy recipe for this mouthful of music:
 First, dissolve 2 1/4 teaspoons active dry yeast in 1/3 cup warm water. And to make sure your yeast is truly “active,” let it sit until it foams — about 5 minutes.
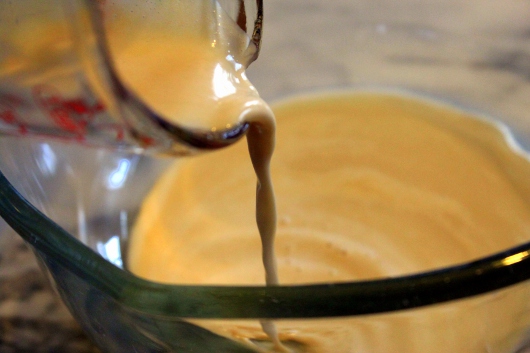 Next, tip the yeast into a big mixing bowl…
 And add 1 1/4 cups warm water.
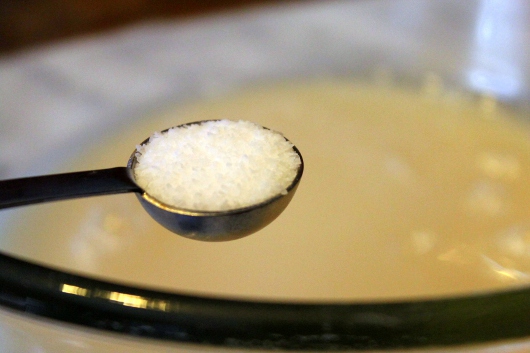 Also add 2 1/4 teaspoons of salt…
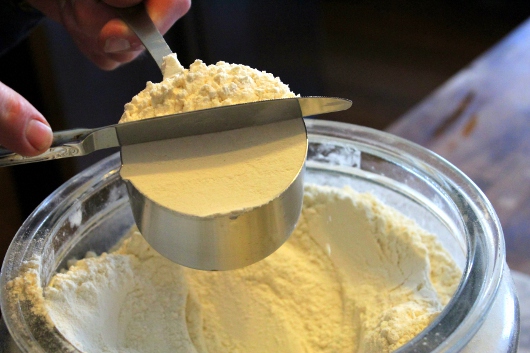 And 3 1/2 cups of all-purpose flour.
As you can see, I measure my flour the “scoop-and-level” way.
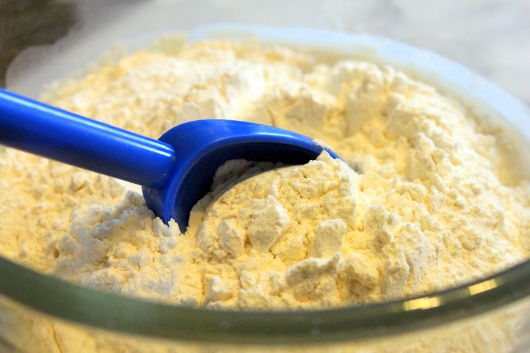 Grab a blue spoon, and stir the works to combine.
And that’s it! Our dough is complete.
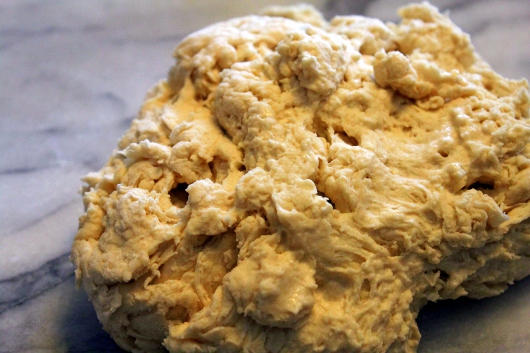 Dump the sticky mass onto a non-porous work surface (I use a marble board) which has not been dusted with flour. Baguette dough is wet and sticky (think of bubblegum). If you add lots of additional flour to alleviate the stickiness, your loaf will develop a too-dense interior, or “crumb.”
Let the dough rest for 2 minutes while the flour particles absorb moisture.
Meanwhile, wash-out, dry, and lightly grease the mixing bowl.
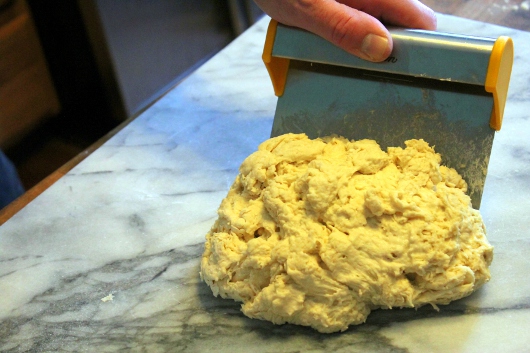 Here’s my favorite part of baguette-making — kneading the dough in what I believe is the old French manner: With your left hand, scoop up the dough with a bench-scraper or a wide spatula…
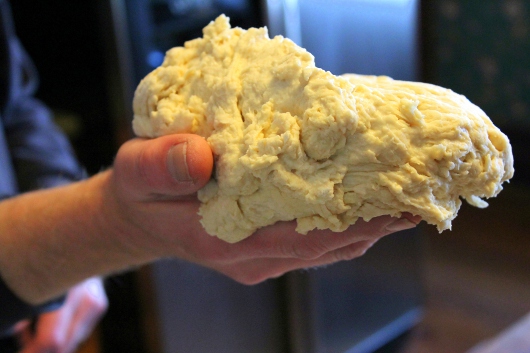 Shift the clump to your right hand…
 And then raise your hand up high, and slam (forcefully fling) the dough onto your work surface.
Repeat this scooping-shifting-slamming action about 40 times, or until the dough becomes elastic and loses most of its stickiness.
Let the dough rest for 1 minute, and then repeat the slamming-procedure for another 40 rounds.
Obviously you won’t have to visit the gym on baguette-making day.
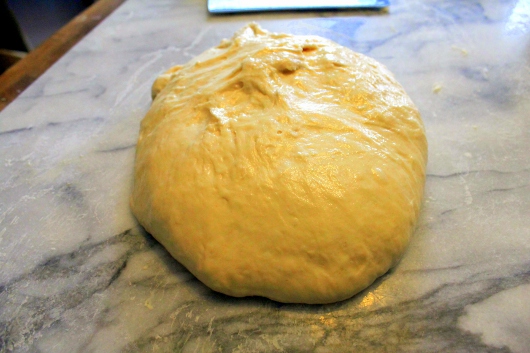 The finished dough will look something like this.
 Drop the dough into the prepared bowl, cover it with plastic wrap, and let it rise until triple in volume — 2- 3 hours in a 75°F kitchen. If your kitchen is incredibly cold like mine, you can place the bowl on a common heating pad set to “low.”
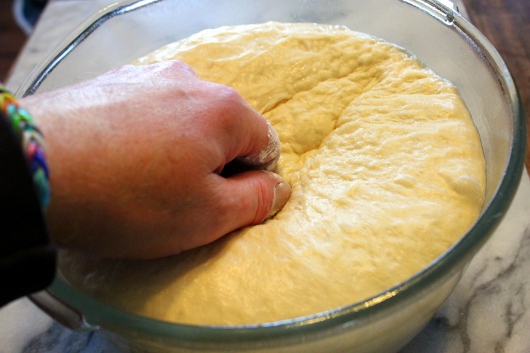 Punch down the dough, and let it rise until doubled in volume — about 1 1/2-2 hours.
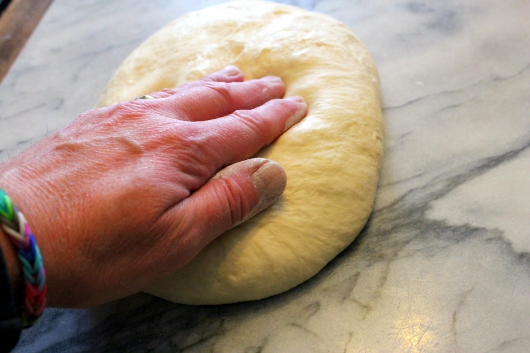 Deflate the dough, dump it onto a lightly-floured surface, and, using lightly floured fingers, pat it into rough rectangle.
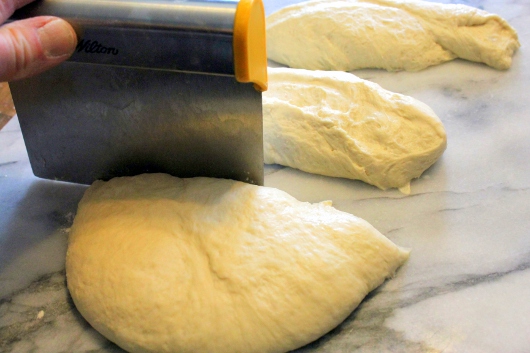 Then cut it into thirds, baby.
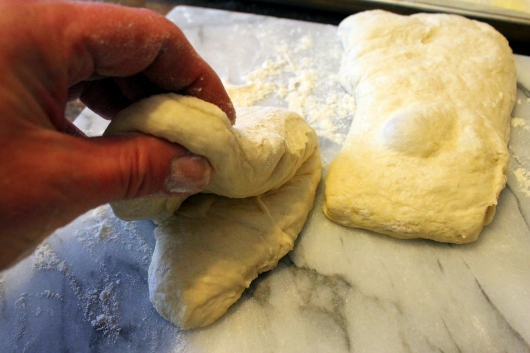 Fold each third in half, as pictured above. Let rest for 5 minutes to relax the gluten.
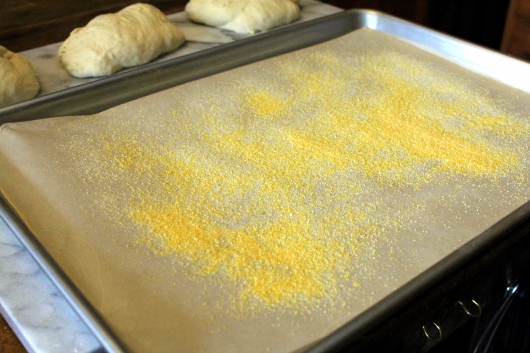 Meanwhile, line a baking sheet with baking parchment. As anti-sticking insurance, I always dust the paper with either flour or cornmeal.
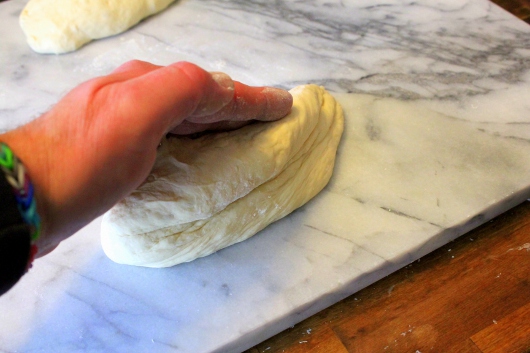 Forming the loaves — Pat one piece of dough into a rough rectangle, and then fold it in half lengthwise.
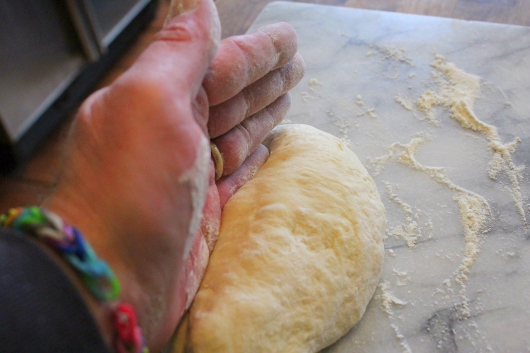 Gently karate-chop the seam to seal it.
I hope you like my bracelet.
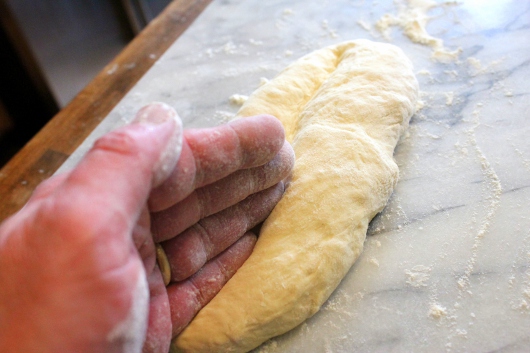 Now flip the dough so its seam-side is down. Then karate-chop a ridge along the center.
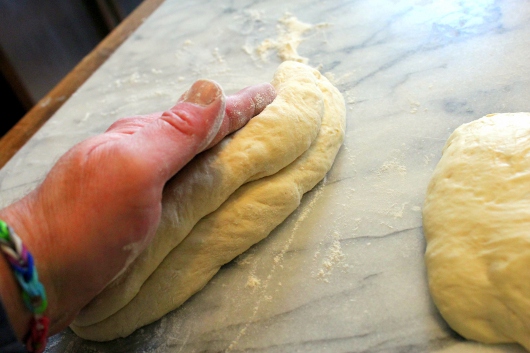 Fold at the ridge, and karate-chop to seal.
I’ll bet you didn’t know you’d be practicing martial arts today.
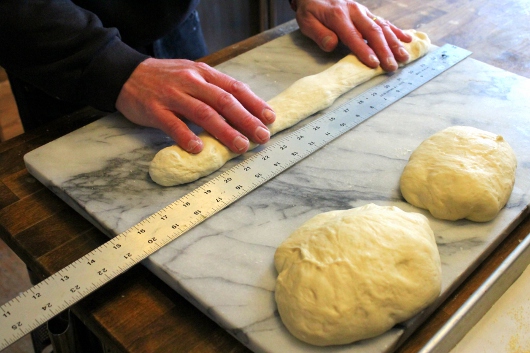 Starting at the middle and working toward the ends, roll the dough into a long rope. I rolled my baguettes into 17-inch-long ropes — the same length as my baking sheet.
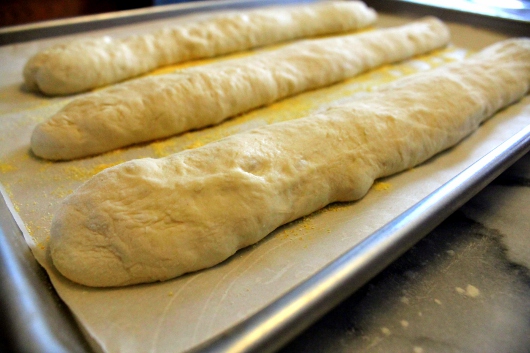 As you finish each baguette, lay it on the dusted baking sheet. Let rise in a warm place until double — about 1 hour.
Meanwhile, prepare the oven: Place one rack at the lowest position, and another in the center. Preheat the oven to 450°F.
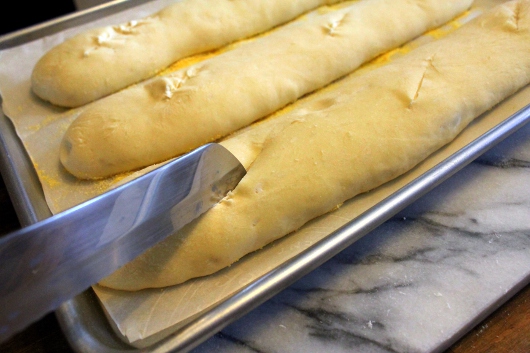 Slashing the loaves — Take a safety razor or a sharp knife, and make 3 or 4 diagonal slashes (1/2-inch deep) atop each baguette. The slashes will open up during baking — and, if all goes according to plan — they will create a beautiful design on the crust.
It isn’t easy to make neat slashes. But I keep trying.
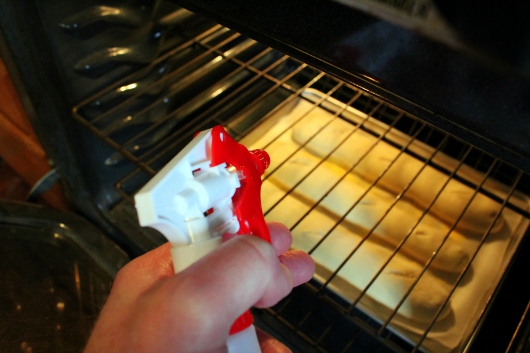 Baking — 25 minutes at 450°F. Place the baking sheet on the lowest oven rack, and immediately spray the baguettes with water. After two minutes have passed, quickly open the oven door, and spray the loaves again. After two more minutes have passed, spray ’em again. The steam will cause the loaves to develop a crackling crust.
No picture of this next step, because I forgot to take one: After 6 minutes have passed, transfer the loaves to the middle oven rack, and continue baking for 19 minutes.
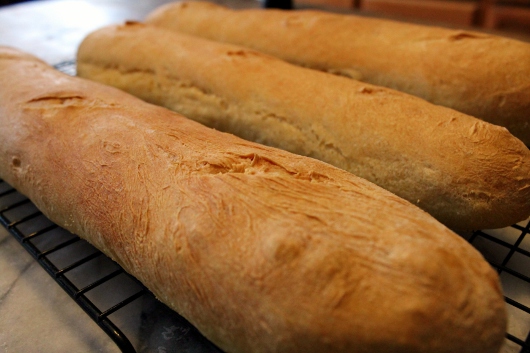 The bread is done when it turns a glorious shade of brown. But we must not touch the loaves until they’ve completely cooled on a wire rack.
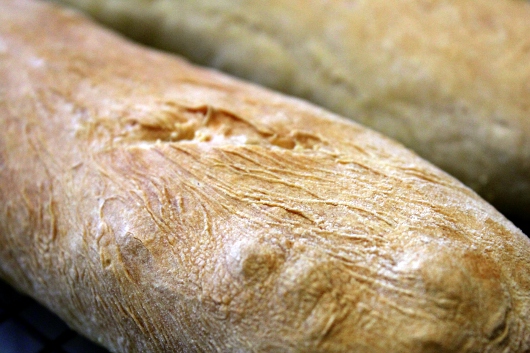 Because I have no willpower, I’m going to tuck into one of my loaves while it is still warm.
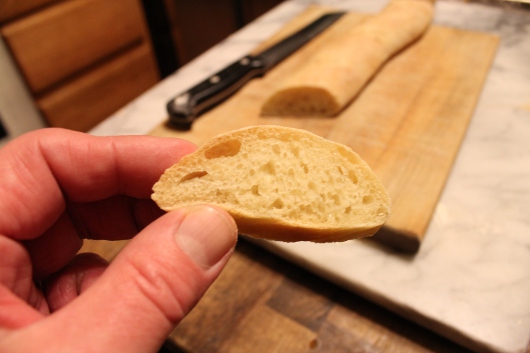 I wish you could hear the crackling sound this bread makes when you slice it, break it, or bite into it. Baguettes are just the thing for sopping up olive oil or spaghetti sauce, or for dunking in a mug of Leek and Potato Soup.
As always, here’s a printer-friendly copy-and-paste version of the above recipe:
Baguettes
Kevin Lee Jacobs, A Garden for the House
Ingredients for 3 loaves
2 1/4 teaspoons active yeast yeast, dissolved in 1/3 cup warm (110°F) water
1 1/4 cups warm (110°F) water
2 1/4 teaspoons salt
3 1/2 cups all-purpose flourSpecial Equipment: A bench-scraper (or a wide spatula); a 17×12-inch baking sheet, lined with baking parchment, and dusted with either flour or cornmeal; a spray bottle filled with plain water
1. Making the dough – Pour the dissolved yeast, the additional water, and the salt and flour into a large mixing bowl. Stir with a spoon until thoroughly combined.
2. Kneading the dough – Dump the sticky mass onto a non-porous work surface (I use a marble board) that has not been dusted with flour. With your left hand, scoop up the dough with a bench scraper, transfer the clump to your right hand, and then slam it down — hard! — onto your work surface. Repeat this action about 40 times, or until the dough becomes elastic and loses most of its stickiness.
Let the dough rest for 1 minute, and then repeat the lifting-and-slamming procedure for another 40 rounds.
3. The first rise – Place the dough in a clean, lightly-greased bowl (you can wash out and dry the same bowl you used before), and cover with plastic wrap. Let rise until tripled in volume — about 3 hours.
4. The second rise –Punch down the dough to deflate it. Then let rise again until doubled — about 2 hours.
5. Forming the baguettes – Lightly flour your work surface. Then deflate the dough, pat it into a rough rectangle, and cut it into 3 equal pieces. Fold each piece in half, and let rest for 5 minutes.
Take one of the cut pieces, and pat it into a rough rectangle. Then fold it in half lengthwise, and seal the seam with a gentle karate-chopping action. Then flip the dough so its seam side is down. Karate-chop a lengthwise trench along the center of the dough. Fold at the trench, and karate chop to seal.
Starting at the center and working towards the ends, use your hands to roll the dough back and forth to create a rope which is approximately the same length as your baking sheet. Transfer the rope to the lined baking sheet. Repeat for the remaining segments of dough.
6. The final rise and preparing the oven – Set the baguettes in a warm location and let rise until doubled in volume — about 1 hour. About 30 minutes before you are ready to bake, place one oven rack at the lowest position, and another rack at the center position. Preheat the oven to 450°F.
7. Baking – 25 minutes at 450°F. Using a safety razor or a sharp knife, cut 3 or 4 diagonal slashes (1/2-inch deep) in the top of each baguette. Set the baking sheet on the bottom rack of the oven and immediately spray the loaves with water. After 2 minutes have passed, spray the loaves again. After another 2 minutes have passed, spray again. After 6 minutes have passed, transfer the baking sheet to the center oven rack, and bake for the remaining 19 minutes.
Cool completely on a wire rack before slicing.
Think you’ll try these baguettes? You can let me know by leaving a comment. Your words are the sunshine of my day.
Don’t miss anything at A Garden for the House…sign up for Kevin’s weekly email updates.
Related Posts:
Pain de Mie in a “Pullman” Pan
Salmon Almondine
Persian Lime Pie

Marjean says
I can smell the yeasty fragrance from here in Oregon, Kevin! I really need to make some bread soon.
Brenda Johnson says
Well done- as always Kevin!!!! This bread is everything you said- and then some!!!! Just delicious!!! I am so fortunate to have you to learn from- and to be your humble taste tester!!!! My pleasure to call you “friend”!!!
Cynthia Beaton says
Ummmm warm Bread with Whey Butter, nothing else needed!
Kevin your bracelet is much more colourful than mine, did you make it or was it a gift from a “short one”?
stephanie says
lovely, kevin – as usual! your recipes just make my day! in my never ending quest for the perfect homemade baguette, i am going to try this tomorrow morning. i have a wonderful sourdough starter and am wondering how to incorporate it into the recipe…any ideas?
Kevin Lee Jacobs says
Hi Cynthia – Bracelet was a gift from a 12-year-old girl who thought I was “cool” enough to wear it. Honestly, I love the colors she chose!
Hi Stephanie – I’ve yet to try my hand at making baguettes from a starter.
Frederica Huxley says
Stephanie – I was thinking the same thing – nothing like a sourdough baguette! Take 1/2 cup of your starter, work out how much of that is water and how much flour – for instance you used 1/2 cup water and 1/2 cup flour – take the amount of water from the 1 1/4 cup water in the recipe and then take the flour amount away from the 3 1/4 cups in the recipe. Sounds complicated,but it is just a direct substitution of the water and flour in the sourdough starter. I would then recommend giving a good 6-8 hour first rise to fully mature the dough. Good luck!
moyra says
Hi Kevin,
How does this bread compare/contrast to ‘stretch’ bread. It looks very much the same, but I think ‘stretch’ bread is a much softer loaf…have you ever made that?
I have a lovely recipe for peasant bread made in a cast iron covered casserole dish, if you are interested.
badger gardener says
I’m watching Will on msnbc!
Barbara Zakrzewski says
Your baguette recipe sounds easy enough that I might just have to try it. Like you though, I would be cutting one loaf while still hot so I could enjoy a thick slice, well buttered!
Chris Thiessen says
Kevin,
Would this recipe work as a pizza dough? I didn’t find a pizza dough recipe on your site. I have made these baguettes and they are wonderful!!!
Heidi Haas says
Did Lily take the picture of you measuring flour?
Kevin Lee Jacobs says
badger gardener – So glad you were watching MSNBC at the right moment!
Barbara Zakrzewski – That’s my problem with bread, too. While it’s still warm from the oven, I like to try one slice with butter. And then another slice with butter and jam. And still another slice with butter and honey. And then there’s the olive oil dipping-test…
Chris Thiessen – So glad you tried this recipe and it worked out for you. For pizza dough, I can highly recommend (as can a number of readers) my recipe for Snowshoe Naan. Here it is.
Heidi Haas – I made this bread while my partner, Will, was home. Consequently he took the pictures that show me measuring the flour and rolling out the baguette dough. Lily simply watched…and waited for something edible to fall on the floor.
Sonnie says
What a fun technique, Kevin! I made the bread yesterday and it was a big success. I have a convection oven, and with this setting the misting and rotating racks is unnecessary; it produced 3 very crisp, light baguettes. Thanks again for a great recipe.
Kevin Lee Jacobs says
Hi Sonnie – So glad the bread worked out for you. One day I’ll own a convection oven. One day.
tammie says
You recipes are so tasty and wonderful…Do you, per chance, have any good gluten free bread recipes that would have a crusty crust like this? Thank you!
Janet says
You have inspired me to bake some baguettes this afternoon–my mouth started watering while reading your recipe. Thank you!
Cynna says
Yum! I love French bread and will try your recipe. Here’s a trick to make slashes in the bread: open a pair of sharp scissors to the desired length of the slash–and snip the top of the dough to create the cut. It works every time!
Pam in Wimberley, Tx says
Lovely!
Susan Rubinsky says
Thank you so much for this step-by-step recipe with photos! I have always screwed up dough/bread recipes (anything with yeast) and you gave far more detail than is usually given and I can already see the areas where I screwed up in the past. I am so excited to try this out. Running out to the store now to get yeast!!!
Melinda says
Thanks for the step by step. I’m going to save this recipe for a day when I’m aggravated. I think it would be a great stress reliever. Not to mention delicious.
Barb L. says
I just purchased a couple baguettes to put in the freezer. This recipe sounds so easy, and I can add crunchy grains to make it my favorite way next time!
Gerry says
This is great! Thank you! I’ve had this on my bucket list, believe it or not, for when I get my hands on some great cheese, olive oil and a good bottle of Beaujolais.
Marie says
Hi Kevin,
Just adding my 2 teaspoons worth here. Since I have found your site I can now make Challah where as every recipe I have tried before failed, yours came out supreme! I have also tried several other of your delicious recipes for my husband and myself and he just loves them! Thank you so very much!
Karen L. says
On my, this sure sounds good! One of the things my husband and I missed when we moved from the Phillie area was good bread. Your description of your baguettes sounds exactly like the way we want our “rolls” …. crispy on the outside and chewy on the inside. Maybe there is hope for us! Thanks for this recipe.
Amy says
Kevin- you are the sunshine of my Sunday when I read your blog. I just love you!
🙂 Amy
Chit says
Hi Kevin…would it be the same yummy crackling chewy if I shape the dough into rolls instead of baguette? Thanks!
Ginni says
All that is missing is the sound effects! You made it sound like a great workout!
Addie B in FL says
Hi, Kevin – that bread looks a bit too time-consuming and fiddly for a retiree like me, but is that a rainbow loom bracelet you’re wearing? I just got back from a week-long visit to my grandkids in frozen Connecticut and my little grandson made one of what I think is the same bracelet you’re wearing. Am I right? And did you make it yourself or was it a gift?
Cheers,
Addie
Lois says
Kevin, your wonderful directions (with pictures!) always give me courage to try things I would otherwise be hesitant to try. The baguettes are great! I didn’t see the need for the spray bottle until the end of the directions, and any in the house probably have traces of insecticidal soap or kelp (!), so I just “flung” drops onto the loaves and into the oven with a silicone pastry brush, and that seemed to be a passable alternative for this first batch/
I confess to enjoying slamming that dough down a little too much. This might be a great activity following a particularly stressful day at work!
Arlene Slobecheski says
Okay, okay! You did it now. I haven’t made my own bread in years but your pics and directions have me craving the whole process and the sound of the bread as I eat it. Here goes!
Pauline says
Thanks Kevin! I use kitchen scissors to cut the slits in the top, works so much easier than a knife!
Anna says
How do you handle “sticky” bread dough? I always feel like I’ve been mud wrestling with a pig and have more on my hands than left on the board. Suggestions?
Jennifer says
I made this bread yesterday, and it is fabulous!
Anna: Do what Kevin says, and scrape up the sticky dough with a bench scraper. Then quickly transfer the dough to your other hand, and immediately slam it down on your work surface. The more you do this, the less sticky the dough will become.
Pam says
Kevin, I can’t thank you enough for the delicious recipes. Each week I look forward to what you will share. The step by step photos make all the difference and your fun directions give me the confidence to go for it.
I made the baguettes yesterday afternoon. Magnifique! My husband & I ate the first one with stew last night. The second one was re-warmed in the oven then sliced down the side to make a terrific tuna sub for lunch today. The last one will be handed over tomorrow to my college boy who texted me a 2 am to tell me how delicious they looked (photos sent earlier).
Thank you for helping to make me a better cook!
DianeVar says
I printed the recipe and think I will try it! I’ve not been successful with baguettes, but maybe this time I will. Thanks so much for all you do.
Janet G. Metzger says
Thanks for the photos! They help. I hope you DID enjoy some with the leek and potato soup!
We have daffodil and quince in bloom. The wind is still so strong, that I need to wear 2-3 coats! Not like feet of snow in New York! I hope you have LOTS of food in the house and can get out soon!
Janet
Anne says
Kevin, do you remember what brand of flour you used for these baguettes? I find that the type of flour makes a big difference in how bread tastes and turns out in general. I would like to try your recipe with the best chance of success. Thanks, Anne
Kevin Lee Jacobs says
Hi Anne – I used ordinary all-purpose flour (King Arthur) brand. It worked perfectly well.
Sheryl says
I tried this recipe yesterday and found that it was too wet (see Anna’s comment #32), so I ended up adding extra flour and letting it rest again. It was still a little “runnier” than yours look, but they came out okay (I haven’t tried them yet, but they look reasonable). I didn’t measure the flour the way you did, so that probably is part of it, but when I added extra flour, it seemed like I had to add more than what I would have lost by not “packing” it the way you did. Any ideas/suggestions? Maybe it’s the kind of flour I used?
Anyway, I can adapt it and I don’t mind taking the time for it to rise and all…just wondering if I can get it to work following the recipe exactly.
Thanks again for all your good ideas. (My winter sown seeds aren’t doing anything yet, but I check on them every time I come and go from the garage when it’s still light out.)
Kevin Lee Jacobs says
Hi Sheryl – Baguette dough is sticky indeed. It always clings to my hands at first, but as I repeatedly (and quickly) lift the dough with the bench scraper, and then slam it down on my work surface, it becomes less sticky and more elastic. In any event, I don’t think you need to fuss over flour measurement. Just try to use as little flour as possible in order to avoid a dense, heavy loaf.
Sheryl says
Thank you, Kevin – they ended up turning out perfectly: I took 2 to a dinner party and people raved about them. (Bread is so funny that way: people think it is hard to make, but it seems like the most important ingredient – besides good yeast – is patience!)
Jean Howell says
This is a great recipe and great fun to make. The slamming the dough down 40 times, then 40 more times got my family into the kitchen to see what the HECK was going on. Bread came out scrumtious.