Last updated on June 24th, 2012
WHY PRESERVE YOUR home-grown (or farmer’s market) produce? First, because these veggies are pesticide-free. Next, having a stash of healthy food in the freezer reduces expensive, fuel-consuming trips to the supermarket. Finally, who doesn’t want to savor the taste of summer during the depths of winter? Here is my easy method for freezing green beans:
A Note on Blanching. To eliminate the enzymes which can alter the flavor of green beans (and other veggies)and turn them into mush when frozen, it is necessary to blanch them first. When you “blanch,” you boil the beans briefly, then immediately plunge them into ice water.
Only Tender Beans, Please. Start with fresh green beans, which are neither too young nor too old. Old beans, fresh or frozen, are woody in texture. Believe me, they are not good eating.
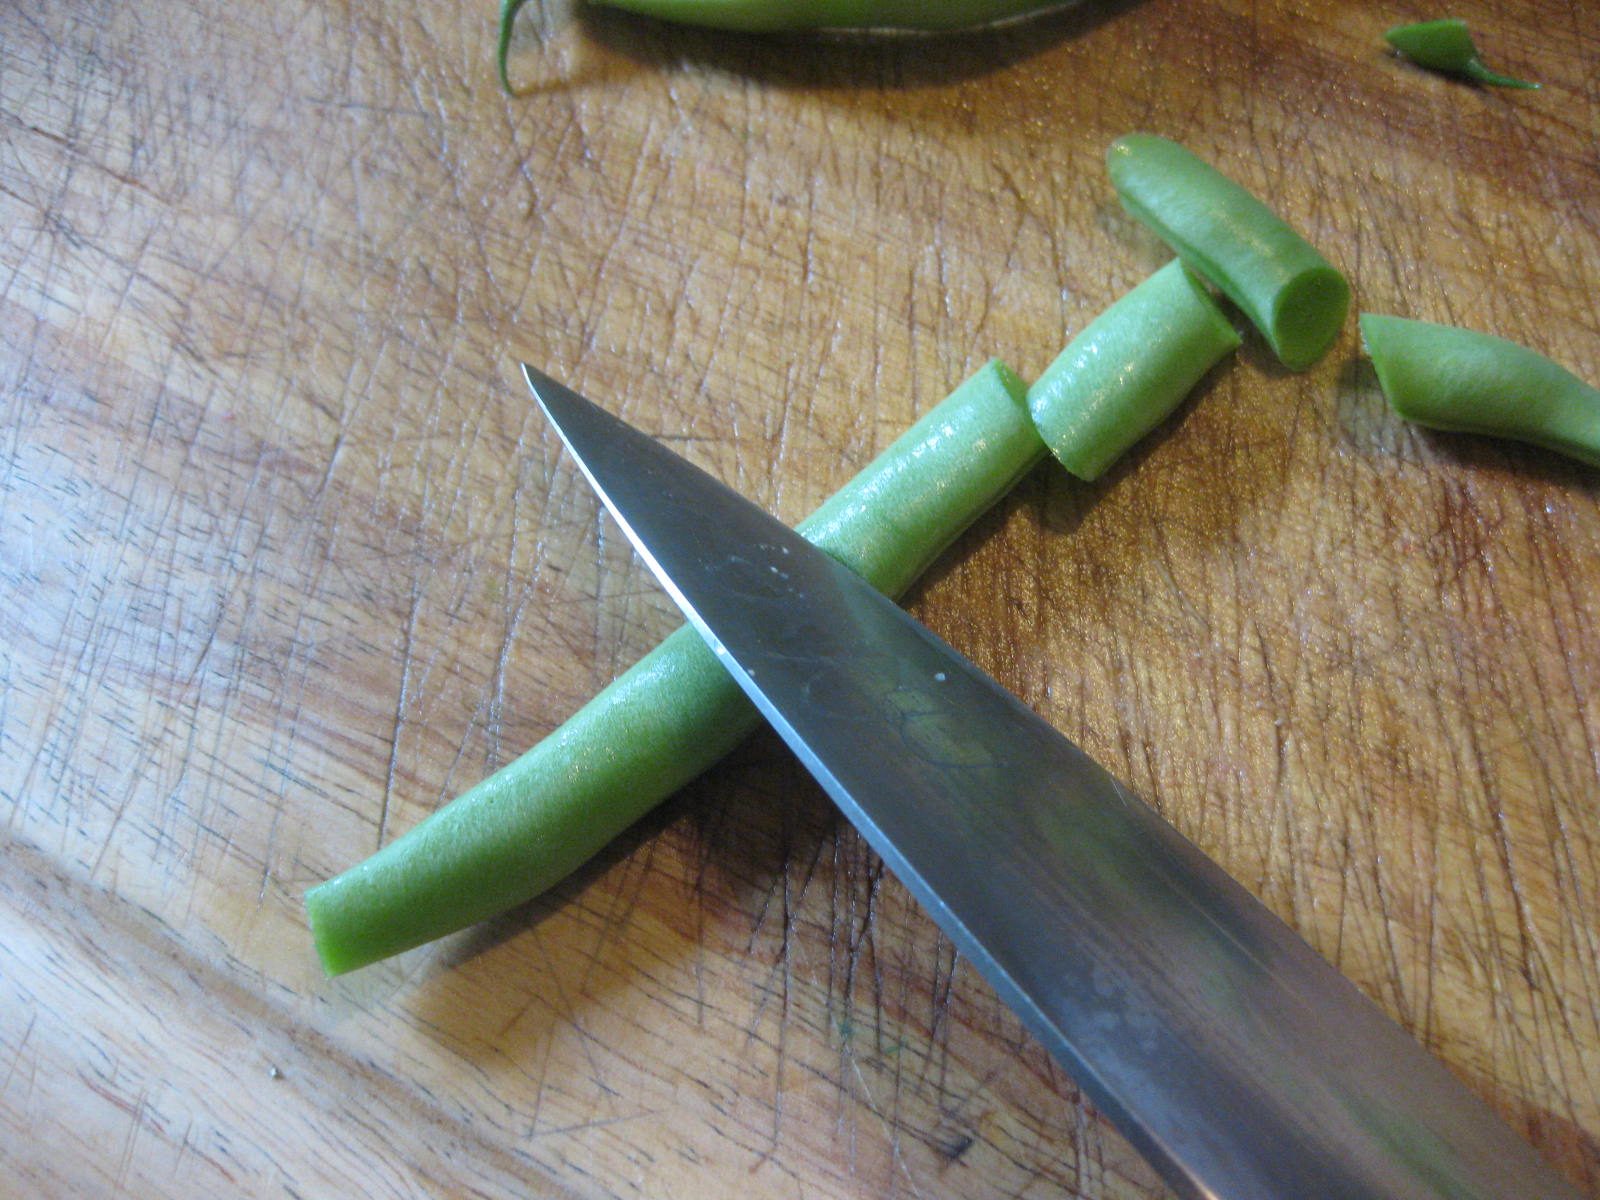 Trimming. As illustrated above, trim ends, then slice the beans into equal-sized pieces. I cut mine into 1/2 inch segments, and I always slice on the bias.
Boiling. Drop the beans into the pot of boiling water; cover, and cook for exactly 3 minutes. Timing begins the moment the beans hit the water.
Chilling. Now, plunge the beans into ice water. I use a big slotted spoon to transfer the veggies from hot water to cold. Chill for exactly 3 minutes.
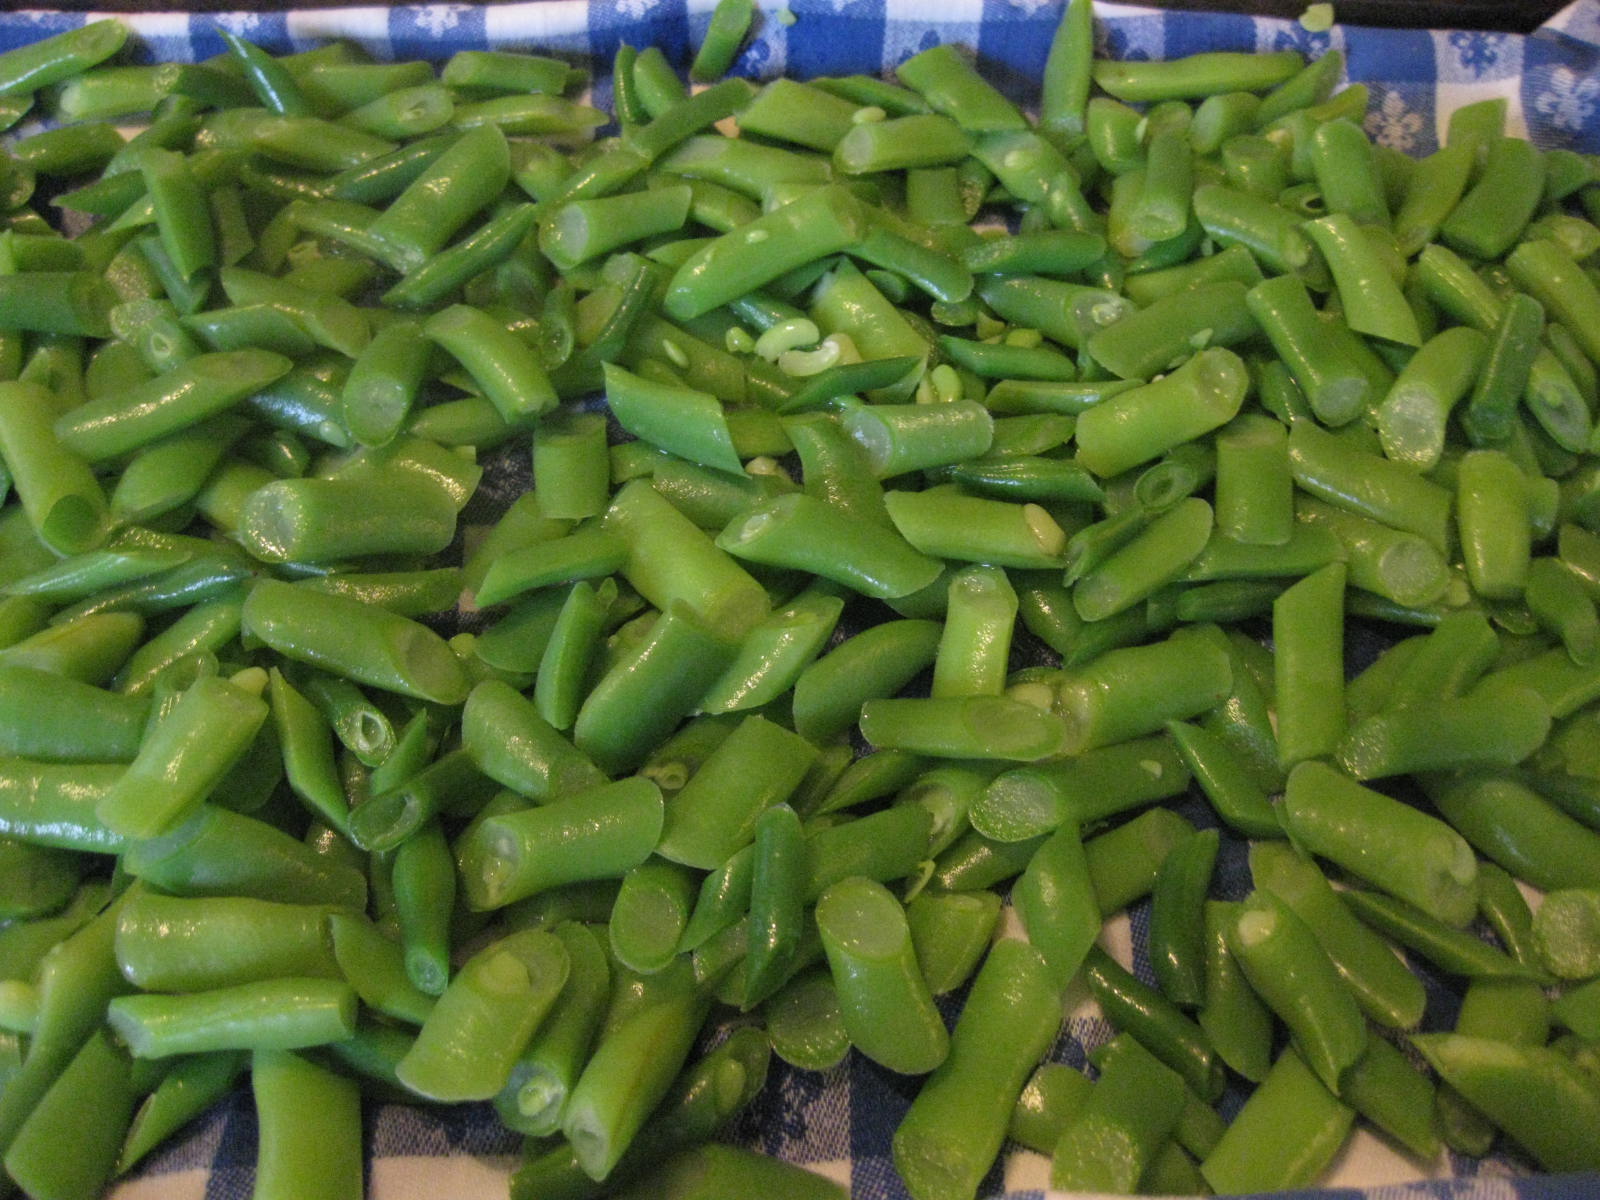
Drying. Retrieve the beans, and lay them out on cloth towel-lined baking sheet, as above. Blot tops of beans with another cloth towel. (Dry beans won’t stick together when frozen in a bag.)
 Freezing and Bagging. Flash freeze on the baking sheet for an hour or more. Then transfer the beans to zip-lock freezer bags. You might limit, as I do, the amount per bag to one serving per family member. Because I am a family of 2, I place one cup in each one-quart bag. In any event, do not overfill bags. When the bag lays flat in the freezer, the beans should form a single layer.
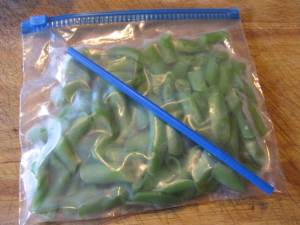
Vacuum-Sealing. To avoid freezer burn, express all air from the bag. I remove air by partially sealing the bag, inserting a drinking straw, and sucking. This is a primitive way to vacuum seal, I know, but it does seem to work. Maybe you are lucky enough to have an electric vacuum-sealer. I aspire to own one.
Properly blanched and frozen, green beans will provide a year of good eating.
If you have other good freezing-tips (or if you wish to laugh at my drinking-straw-vacuum-technique), by all means speak your mind in the comment field below.
Don’t miss anything at A Garden for the House…sign up for Kevin’s weekly newsletter.
Related Posts:
Super Easy Refrigerator Pickles
How I Plant, Grow, Harvest & Store Potatoes
How I Harvest & Store Winter Squash

Terry says
I will not laugh, as I also suck the air out with a straw. Why buy yet another electric device to take up room in the cupboard when a straw and my own wind power will do the job?
Kevin Lee Jacobs says
Terry – Amen.
Eric says
This is news I can use, Kevin! I have lots of green beans. I'm off to pick, blanch, freeze and bag them.
Phoebe says
I don't have a “food saver” gizmo either. Straw works fine, and no freezer burn ever.
Eric says
Kevin, based on your excellent directions, I just put up 5 bags of green beans. What a sense of accomplishment!
Eric says
Oh, and the straw worked great. The beans really look “vacuum packed.”
sksweeps says
Another 'straw user' here! I planted, successfully harvested and froze my own green beans for the first time this summer! Oh course, I have to admit, I snuck quite a few before freezing to snack on – boy are they ever good at that point!
Kevin Lee Jacobs says
sksweeps – Congratulations! I can't resist eating them as I work, either. Even my beagle loves them!
Donna B. says
Brilliant! Just brilliant… I will have to use that straw technique! Well, that is, if I even have any beans left… I tend to eat them all before they even get to the kitchen! Hee hee.
sksweeps says
I've also got a 'steamer' sort of double boiler pot – regular pot with insert that has holes in it that fits into regular pot. This steamer section is about 8″ tall, going into a pot about the same height (steamer section has a solid band about 2″ high around the top that sticks up above bottom pot). This is a great setup for green beans. I get bottom pot filled with boiling water, have cut beans in steamer section and put into boiling water for 3 minutes. Then, I just pull the steamer portion, complete with beans, out of pot, and drop entire steamer section directly into prepared ice water bath. No slotted spoon, fishing for beans… Worth it's weight in gold for ease and time savings!
Kevin Lee Jacobs says
Donna B. – Fresh green beans are so delicious, it's no wonder you're eating them all!
sksweeps – You've just described the very gadget I need. Must go shopping for one. Soon.
marion says
Thank you so much for this information! It answers every question I had about freezing green beans and couldn't find anywhere else.
Kevin Lee Jacobs says
marion – Glad to be of service!
Carla says
I have not had any luck with two links for https://www.agardenforthehouse.com/2010/07/easy-refrigerator-pickles or https://www.agardenforthehouse.com/2010/08/my-favorite-herb-preserving-techniques
I would love to see both of these. Any dance that they can be reposted?
Thanks
Carla
Betty says
Kevin… I love your website! Can green beans be dehydrated for storage? Any idea on how the flavor would compare with frozen green beans?
I am so envious of your yard… we live in the desert between Phoenix and Tucson, and even though there are a lot of beautiful cactus and desert plants here, I really miss a yard with lawn and shrubs, and large green shady trees.
Deb says
Thanks for answering the age old “when does the timer start on blanching” question!
Mike Hylton (Sarge) says
Thanks everyone for the great input! I am gonna be busy today using your advice! I’ve always canned green beans, never froze them before, but sounds so easy! Again, Thanks!
Kevin Lee Jacobs says
Carla – Thanks for letting me know about broken links. The “breakage” occurred during my migration from blogger to WordPress. Anyway, links are fixed. I’ll repost herb-preserving feature this week.
Betty – So glad you enjoy this site. I’ve never tried to dehydrate green beans, so can’t advise you on how the flavor might be effected.
Deb – Glad to be of service!
Mike – I promise you this freezing technique is as easy as it sounds!
Chrissy says
Green beans can be dehydrated. I can’t advise you on the flavor as this is the first year I’ve done any dehydrating, but thought I would try a few this way. They also have to be blanched prior to dehydrating, otherwise they will turn black.
Great tip with the straw for pulling out excess air…love it!
Brad says
Thanks Kevin – sounds like good advice – I have always preferred canned green beans, because frozen ones seemed “squeaky” to me when I ate them. Possibly was not preparing them correctly. I will definitely give your method a try…..next year. My beans are already gone this year. By the way, I have a vacuum food sealer. It does work well, but it is another electric gadget that takes up space, is expensive to use (their bags are not cheap) and probably doesn’t work any better than the straw idea – thanks for sharing that too.
Kevin Lee Jacobs says
Brad – I think you are right about the vacuum-sealer versus straw. It’s hard to see in the photo up top (and in other photos in my Preserving the Harvest series), but the straw-trick does create a surprisingly-respectable vacuum-seal.
Marty Clark says
Could someone please explain, FLASH FREEZING? Can it be used with a vac-sealer? I have great luck with cooked meats,greens and soups, but want to freeze raw (blanched) fresh from the garden.With many thanks, Marty
Kevin Lee Jacobs says
Marty – As I understand it, flash-freezing is when you lay blanched beans (or whatever) on a baking sheet in a single layer, and then freeze them. Freezing this way keeps the veggies from sticking together when you bag them. But if the produce is already dry — as in my directions for green beans — sticking is not likely to occur. (Well, I hope I answered your question!)
COBAYLEY says
Kevin…great tips. We froze many pounds of beans last year from the farmers market. I’m anxious to try again using the method of drying them before freezing. Any suggestions for cooking them after they are frozen…not recipes, but just as green beans. I found that my frozen beans needed only about 2 minutes in the microwave and they were perfectly cooked.
Sandy Sebold says
Thanks for the information on freezing beans. This is the first year I’ve ever grown green beans and I am now looking forward to freezing some for the months, ahead! I would love to know how you cook them fresh and then how to cook them frozen, thank you!
Gretchen says
There’s just no way I will ever laugh at any of your tips or ideas, Kevin. Your tips and how-to hints are simply too good to be given such disrespect. For many years I used the straw technique to draw a light vacuum for freezing produce, then I was given one of those vacuum gadgets. They’re great for putting up big batches of whatever, but for small batches of 5 or 6 items, I still use the straw.
Dodie says
Hi Kevin from beautiful Vancouver, British Columbia CANADA, way over on the west coast
of the continent.
Love and enjoy your website, emails, quips and tips.
Years ago I used to ‘blanche my beans’ too.
(sounds like it could be a title for a cooking/gardening song~ stay with me it’s been a very loooong heat spell here)
But one super hot summer while ‘canning & jamming’ I got smart and tried this 1 – 2- 3 method.
1. Place freshly picked beans on cookie sheets IN A FLAT LAYER.
2. Let freeze solid (overnight works for me.)
3. Take out of freezer next morning and put into Ziploc freezer bags, label’, then return them to freezer again.
Remember to work quickly so things don’t defrost.
Since I started doing this 12 or so years ago it has made things so much more efficient and
cooler in the kitchen in the hot summer months.
Whenever you need a particular amount, you just grab a bag out of the freezer, take out what
you need and put the rest of the beans (or whatever) back.
No more frozen chunks of produce to deal with.
Everything freezes individually ~ just snap off the ends and break into sizes you want before cooking.
Oh snap … so easy! 🙂
This is a brilliant way to do all of your peppers, broccoli, cauliflower, carrots also..
This is how I do ALL of my berries ~ strawberries, blueberries, raspberries, & blackberries.
Kevin Lee Jacobs says
Dodie – Thanks for the tip!
Patricia Mersman says
is the blanching water salted or unsalted?
Kevin Lee Jacobs says
Hi Patricia – Unsalted water for blanching. Enjoy your freezing project!