Last updated on March 16th, 2019
 French baguettes in an American kitchen? Yes! And you can make these crusty batons entirely by hand. Here’s my tried-and-true method for mixing, kneading, forming, and baking the 3-ingredient dough:
As you’ve just seen, baguettes are not difficult to make. For me, the hard part is what comes next — producing a printable recipe for you! Honestly, I think the video is your best guide here. The printable version is gonna make the whole baguette business sound like a true ordeal!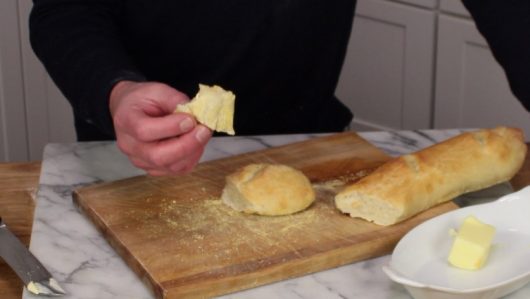
So don’t let the printable recipe scare you. Again, baguettes are both easy and FUN to make!
Hungry for more? Get my email updates and subscribe to my YouTube channel!
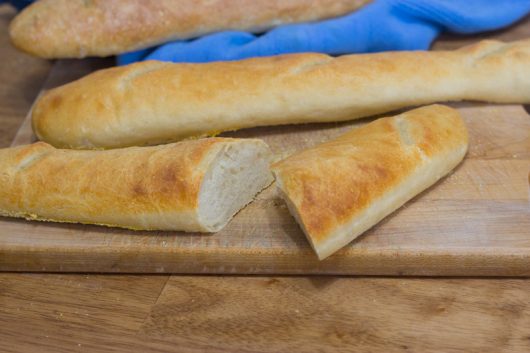
A baguette is a rope-like loaf with a deep, yeasty aroma, a chewy interior, and a crackling-crisp crust. A moist oven -- easily achieved by placing a pan of water on the lowest rack -- will produce the crispiest crust.
Ingredients
- 3 1/2 cups all-purpose flour
- 2 1/4 teaspoons salt
- 2 1/4 teaspoons active dry yeast, dissolved in 1/3 cup warm water
- 1 1/4 cups warm water
- Corn meal for dusting the baking sheet
Instructions
- Making the dough – In a large mixing bowl, stir together the flour and salt. Then add the dissolved yeast and the 1 1/4 cups warm water. Stir until all of the flour is moistened.
- Kneading the dough – Dump the sticky mass onto a clean, non-porous work surface (do not dust the surface with flour). With your left hand, scoop up the dough with a bench scraper, transfer the dough to your right hand, and then slam it down – hard! – onto the work surface. Repeat this action about 40 times, or until the dough becomes elastic and loses some of its stickiness. Let the dough rest for 1 to 5 minutes. (Use this time to wash out, dry, and lightly grease the mixing bowl.) Then repeat the lifting and slamming of the dough for another 40 rounds.
- The first rise – Place the dough in the cleaned-out and lightly greased bowl. Cover the bowl with plastic wrap. Let the dough rise in a warm (about 72°F) location until tripled in volume – 2 1/2 to 3 hours.
- Deflating the dough and the second rise – Lightly flour both the work surface and your fingers. Gently deflate the dough by scooping it onto the work surface. Then pat the dough into a rough rectangle, and fold it over itself in thirds, as if folding a business letter. Return the dough to the bowl. Cover the bowl as before, and let the dough rise until doubled in volume – 1 1/2 to 2 hours.
- Forming the baguettes – Line a baking sheet with parchment paper, and dust the paper with corn meal. Then lightly flour the work surface and your fingers. Deflate the dough, dump it onto the work surface, and pat it into a rough rectangle. Then cut the dough into 3 equal segments. Fold each segment in half, and let rest for 2-5 minutes. One at a time, pat each segment into a rough rectangle, and then tightly roll it into a cylinder. Pinch the seam to seal it. Then, with floured palms, rock the cylinder back and forth on the work surface until it stretches to nearly the length your baking sheet. Transfer each cylinder to the prepared baking sheet, spacing them approximately 2 inches apart. Cover with lightly-greased plastic wrap, and let rise until doubled in volume – 30-45 minutes.
- Preparing and heating the “steam” oven – Place one rack at the middle level of the oven, and another on the lowest level. Set a rimmed baking sheet on the lower rack, and fill it with water. Then heat the oven to 550°F.
- Misting, scoring, and baking the baguettes – Remove the plastic wrap, and lightly mist the loaves with water. Then use kitchen shears to make 3 or 4 diagonal slashes (1/2-inch deep) in the top of each loaf. Transfer the loaves to center oven rack, and bake for 15-20 minutes, misting the loaves at 5 minute intervals, until they are brown and crisp. Then turn off the heat, and let the loaves stay in the oven for an additional 5 minutes for further crisping. Transfer the finished baguettes to a wire rack, and let them cool completely before slicing and devouring.

Caroline A Gray says
You put a new light on the technique of bread making. I’d like to add to them. I started making bread in 1963 however, only last year did I attain what I was going for.
I always let my bread rise in a cool kitchen. The dough reaches a height of flavor unbeatable. The second point; I put a pan in bottom of the oven during pre-heat. When its time to put the bread in I throw a few ice cubes into the bottom pan. Just before end of bake I throw in a few more.
Like you, oven goes off and if the bread is browned, I simply crack the door and let the bread cool. It ensures that the crust isn’t thickened due to interior moisture.
I still can’t figure out how to maintain that gorgeous crispness for more than a day. But it does make great garlic toast and French toast, doesn’t it.
I loved your method of treating the “sticky” dough so lightly.
My regards. Caroline
Sandra Payette says
Thanks for this, Kevin. I’ve been all over the internet and trying baguette recipes without much success. Love the kneading process. This is my next go to bread recipe. I’ll try it out on my French friends. Great! Fairly simple too. xo
Annie says
Wonderful video!! Recently, I have been on a bread making kick. And no I have not perfected it. Bread is an art to me…LOL!
I will be making this baguette recipe this week. I do have a “q” for you…..obviously bread is the best when fresh. What is the best way to keep the bread fresh until the next day? I have been wrapping in plastic and keeping at room temp.
Thanks much!
Anne-Marie Deryaw says
Yum!! I’m hungry for baguettes now! Thank you so much for this recipe!!!
Peggy says
Have you made this into sour dough Baguettes. Trader Joe’s has a excellent flavor of it . I haven’t found any where else. Will definitely try this of yours. Thank u.
Morgan says
Baking in black, without an apron! Bold move, Kevin. Mixing and throwing dough, and not a spot of flour on you. Kudos! Nice recipe, thanks.
Nancy says
At one time a grocer in our area had wonderful baquettes, but alas it closed. So, I tried my luck at several supermarkets in the area and of course there was no comparison. So, like Sandra, I have been looking on the Internet for ‘how to ‘create baquettes myself. And I am going to try your version first. The slamming technique appears something that might be fun on a day when the world seems out of control and a bit of aggression is in order. Thank you so much for this recipe!! And a question, where did you purchase the marble? Thank Kevin for bringing a bit of fun and enjoyment to the kitchen!!! Happy Valentines to you and yours!!!
Kevin Lee Jacobs says
Hi Morgan – All of the flour landed on my jeans!
Hi Nancy – The marble board is wonderful for kneading bread. I purchased mine from a local kitchen-supply store.
Judy Hines says
Kevin, when the kids were little I used to make bread but haven’t one so in years. What I love about bread making is the smell that permeates the house.
Mary Jouver says
Yumm!
sandra says
making the baguettes now – almost done the second rise. However .. in the video you are spraying every 5 minutes but the printable recipe (which I am using) says spray at minute intervals. HELP!!! WHICH IS IT?
Kevin Lee Jacobs says
Hi Annie – Great question regarding storage! In my experience, just-baked bread will retain its freshness if stored in a paper (not plastic) bag for the first 12-24 hours. Thereafter, freeze the bread in an airtight plastic bag.
Hi Sandra – Mist at 5 minute intervals. Let me know how the baguettes turn out for you — xKevin
Lori says
What do you serve the baguettes with?
Sandra says
Hi Kevin:
Baguettes turned out just fabulous. My son and two grandaughters dropped in and we ate two of them in a matter of seconds. I was not prepared for the visit so unfortunately did not have a great soft cheese and red wine to go with it so we had it with butter and Swedish meatballs. I have to freeze the remaining loaf or I will eat it. Really great, thanks. Oh but one thing I didn’t bake at 550 I baked at 450.
Garden Maven says
Kevin, tremendously helpul. Loved the heating pad idea. You make everything look so easy to do! Can’t wait to try this recipe! Thanks a lot. Great website!
Kevin Lee Jacobs says
Hi Sandra – Music to my ears. Like you, I froze the third baguette just to stop myself from eating it!
Carillon Orban says
Hi Kein,
Can I freeze a baguette before baking or do I need to freeze after baking? Thanks and love your blog!
Kevin Lee Jacobs says
Hi Carillon – I’d bake the baguette first, then (when completely cooled) freeze it. Enjoy!
AnnieW says
Lovely! I will try your baguette recipe. I have only one suggestion. Get yourself a bowl scraper and you will get every last bit of sticky dough out of the bowl making washing the bowl a snap. Here’s one like the one I use regularly for my sourdough bread. I love it.
https://smile.amazon.com/Fox-Run-6060-Scraper-Silicone/dp/B0051C34I2/ref=sr_1_17?crid=5IZ4IF3KNRXF&keywords=bowl+scraper&qid=1550020914&s=gateway&sprefix=bowl+scrap%2Caps%2C213&sr=8-17
phyllis says
OMG: WOW, WOW……cannot wait to make these breads. I have always been intimated using yeast, but I will try this. Thank you so much.
Gina Bruehl says
Happy Valentine’s Day Kevin! I really enjoyed watching this French Baguette video. I am so intimidated when making homemade bread. You have inspired me to give these a try. If all goes well I will serve them with the Valentine’s Day dinner I’m making for my sweet husband!
Love and big hugs to you and yours!
Kevin Lee Jacobs says
Hi Annie – I do have a bowl-scraping gadget. Somewhere.
Hi Phyllis – If you make these baguettes, please let me know how they turn out for you!
Hi Gina – Happy Valentine’s Day to you and yours!
Patt Reid says
I’ve never found homemade baguettes to equal the “product” of one baker in St. Barth’s who did things in the truly Old Method. In fact, never found anything commercial either. She passed away long ago, and her family attempts to carry on the tradition. Good enough, but not the same. One thing she did that interested me, but I never found out the “why”. She put a thin strip of palm leaf across the top, the length of the bread. My friend’s son used to go p/u the bread, and ate a big part of one loaf as he walked along the beach to his home.
After that trip down memory lane, I promise I will try to do this myself. Maybe with practice????
Lynne McGee says
I tried your method and.. Voila! The best baguette recipe I have ever tried. I substituted a half cup of whole wheat flour for added flavor.
Keeping the dough sticky is the key and the slam and scoop technique really works.
I look forward to a visit with you every Sunday morning.
Mary Schmidt says
This was a fun recipe and everything went well until I baked the baguettes. The 550 degree oven was too hot. After 10 minutes, the baguettes were starting to burn on the top. I shut the oven off & let them sit for 5 minutes. They were done throughout, but tasted a little burnt on top and were very white on the bottom. I will try again, but plan to turn the temp down after getting the water hot and before putting the baguettes in the oven.
Kevin Lee Jacobs says
Hi Lynne – Thanks for the review. So glad the baguettes worked out for you!
Hi Mary – If your oven runs “hot,” try baking the bread at 450°F. Hope you’ll give the baguettes another go!
Supriya Kutty says
Nice recipe.. really you have explained this recipe in very simple manner where you have provided video as well which gives the confidence to try this once more, It is actually just simple chemistry between flour and yeast but the weather, the quality and consistency of the flour (which varies across brands and countries), the temperature temperaments of ovens and even the altitude of the place decide the character of bread. For me, baking bread is a bit like solving a cryptic crossword.